Spot welding is a mechanical bonding method which lends itself to high production volumes. An example of this is the motor car industries use of this bonding method. A typical car requires between 3,000 and 5,000 spot welds.
点焊是一种机械焊合方法,这种特性使得它具有生产率高的特点。使用该焊合方法的一个典型例子是汽车产业。通常一辆轿车需要3000到5000个焊点。
A simplified diagram of the welding process and its parameters is illustrated below.
该焊接方法的一个简化的示意图和参数如下所示。 www.dingzhi18.com www.dingzhi17.com
021-32535037 021-32535039
Type of material
材料种类
Type of coating (if applicable)
涂层种类(如果使用的话)
Number of sheets (plates)
钣金数量(层数)
Sheet thickness
钣金厚度
Nugget diameter (usually given by the formula d = 4x(square root of t), where t is the thickness of the thinnest plate in the combination)
融核直径(通常由公式d=4x(t的平方根)确定),该处t为在连接的钣金中*薄钣金的厚度。
No weld 无焊点
Small nugget 小焊核
Thin nugget 薄焊
Stick weld 粘接
Flaws (porosity) in nugget 焊核中有缺陷(孔洞)
Burnt spot 过烧
Direct cost savings 节省直接成本
nReduce inventory loss 减少存货损失
nReduce inspection time 降低检测时间
nImprove testing safety 提高检测安全性
Indirect cost savings 节省间接成本
nImprove reliability of welds 提高焊接的可靠性
nImprove reliability of welding process 提高焊接制程的可靠性
Documentation – comply with ISO 9000 / EN Norm 文件-符合ISO 9000/EN规范
The current method is to test the spot weld using the chisel and hammer method accompanied by visual inspection. This method takes time and the part often requires rework or is often discarded.
当前的检验点焊的检测方法是采用凿子或锤击然后目视检测。这种方法花费时间而且部件需要被重新加工或被丢弃。
Testing to destruction of car sub-assemblies and/or complete car bodies. The costs associated with this method in three of the United State’s biggest car manufacturing plants are estimated to $400 to $600 million per year through loss of value-added inventory.
检测时要破坏汽车零部件和/或整车车体。这种方法的造成的相关成本在美国*大的三个汽车公司中估计达到4亿到6亿美元。
Other non-destructive testing methods have been tried for inspecting spot welds, but most of these fail to reliably detect “stick” or “cladding” type spot weld defects. These methods include: thermal/infrared, electrical conductivity, x-ray and eddy-current methods.
其它的无损检测方法也曾被用于检测点焊,但它们中的大多数不能可靠检测如“粘结”或“覆层”类的点焊缺陷。这些方法包括:热/红外,电导率,X射线和涡流方法。
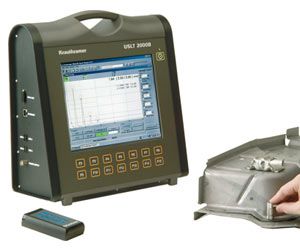
The ultrasonic method is fast, “stick” welds can be detected and automated classification allows to inspect production line spot welds in an efficient and reliable manner.
超声方法是快速的,“粘结”焊点可以被检测和自动分类,所以可以对点焊生产线进行高效和可靠的检测
If 50% of the components including spot welds could be tested non-destructively and then sold, the potential cost savings associated with the previous example could be approximately $200 to $300 million per year.
如果50%的部件(包括点焊)可以使用非破坏性方法检测,然后出售,在上例中每年可以节省的成本可达2亿到3亿美元每年。
Reducing by 10% the number of redundant welds in a car may yield savings of $400 to $600 million/year.
每辆汽车减少10%的多余焊点每年可以节省4亿到6亿美元。
The effective diameter of the UT beam should be equal to the diameter of the nugget
超声波声束的有效直径应该等于融核的直径。
The nugget diameter can be determined according to the thinnest plate thickness as follows:
融核点的直径可以根据*薄板的厚度计算如下:
D = 4 x d10.5
The transducer frequency required for a given plate thickness d1 can be approximated by:
根据给定钣金厚度d1可以估计探头的频率 > 3c/d1
 Spot welding is a mechanical bonding method which lends itself to high production volumes. An example of this is the motor car industries use of this bonding method. A typical car requires between 3,000 and 5,000 spot welds.点焊是一种机械焊合方法,这种特性使得它具有生产率高的特点。使用该焊合方法的一个典型例子是汽车产业。通常一辆轿车需要3000到5000个焊点。A simplified diagram of the welding process and its parameters is illustrated below.该焊接方法的一个简化的示意图和参数如下所示。 www.dingzhi18.com www.dingzhi17.com


